To register, use the form at the bottom of this page
Number of Attendees: 3 Duration: 6 hours Venue: Wales/Scotland (see booking form at the bottom)
Shooting on location can provide us with much more of a narrative to our pictures. Not all images need to have a narrative of course (despite what image critics, and competition judges may tell you); sometimes we just make things that look cool. If, like me, you want to shoot some cinematic images full of mood and drama, and learn how to produce effective lighting in remote locations then this is the workshop for you.
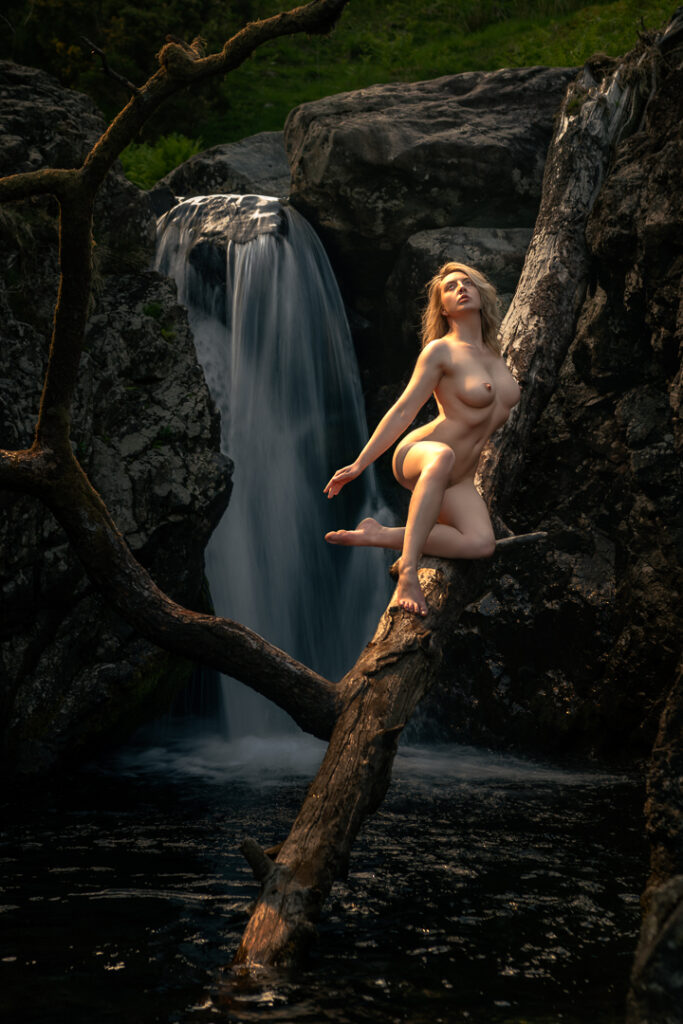
Join us as we explore 3 beautiful hidden gems in Scotland’s lochs and the Trossachs.
Stunning castle ruins where Robert the Bruce (Kerry’s ancestor!! )once took shelter, a stunning grotto with mossy rocks and a waterfall off the beaten track and a beautiful serene Lochside with mountain views.
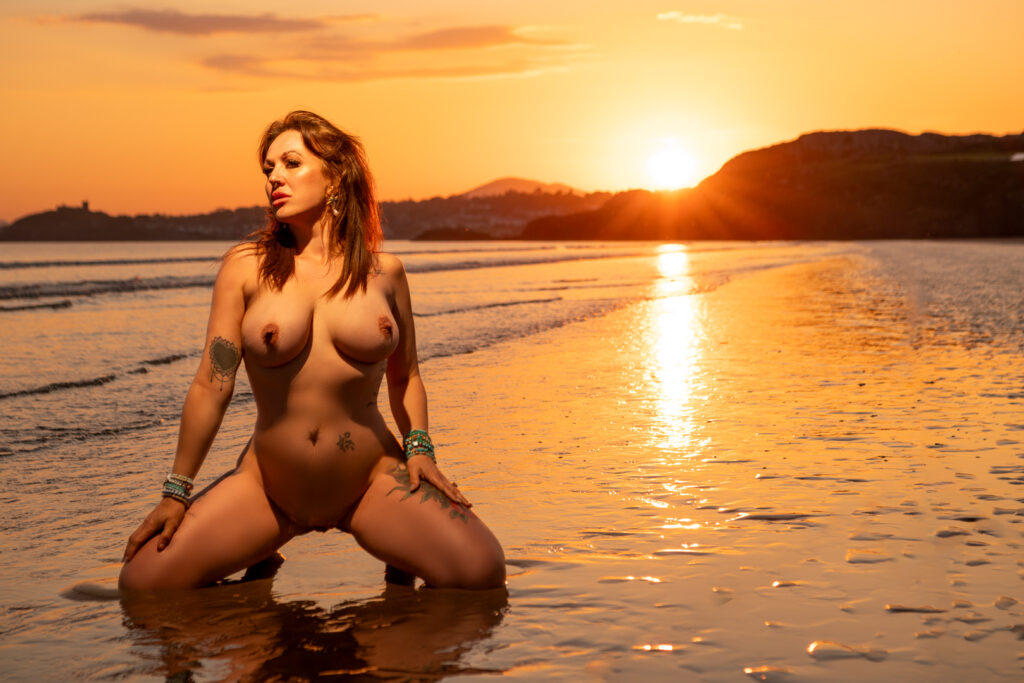
We will be capturing ballgowns to stunning nudes
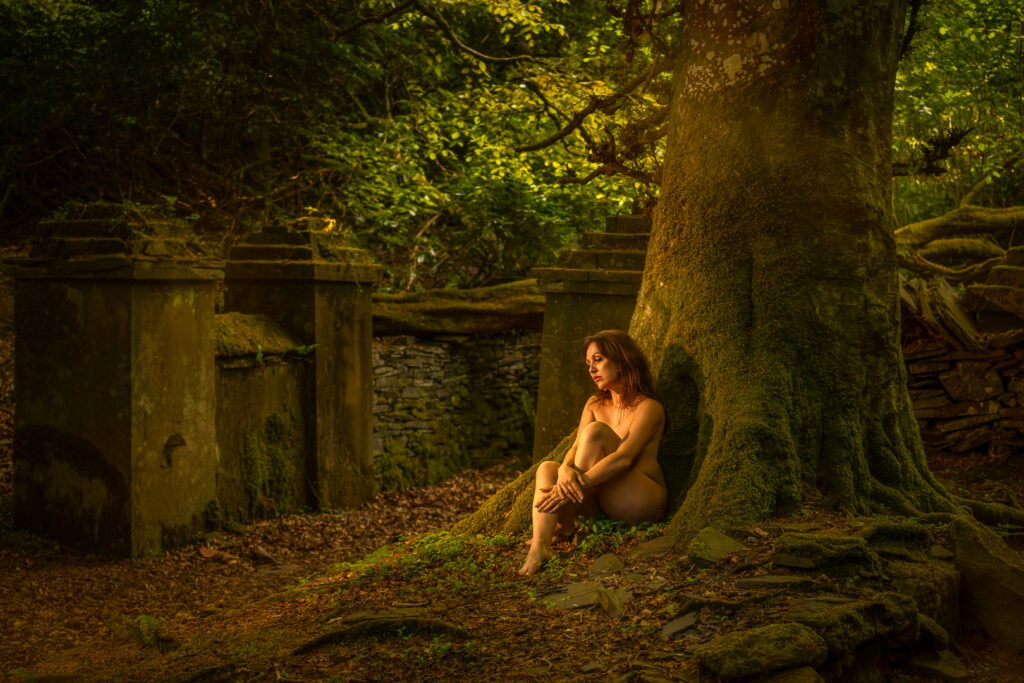
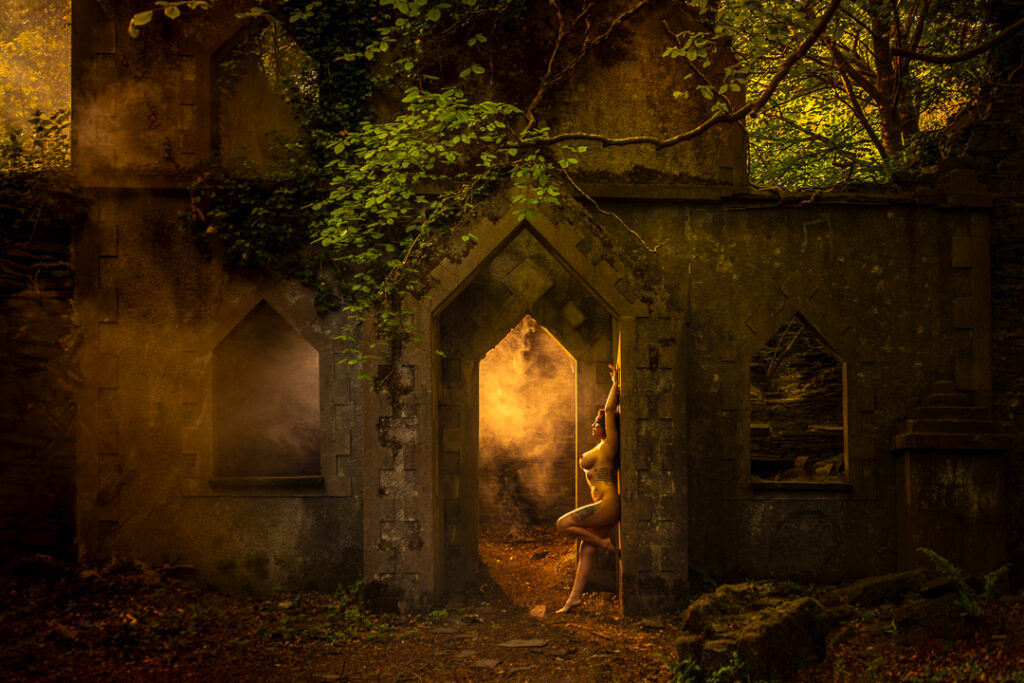
Plus we’ll also be running this workshop at our usual North Wales location (pictures below) with enchanting ruins reclaimed by the forest. There are many structures such as the big house below, arches, slate walls, and tress of every size and shape.
The course content is the same at both locations – we’ll explore using the natural sunlight, with different techniques depending on whether it’s cloudy or clear, and mixing in our own flash powered lights for some extra drama.
Own transport a must and must be comfortable walking and climbing to locations etc
This page also outlines the preparation you’ll need to do if you’re joining a workshop or tutorial with me, on location, and some notes on key concepts to save time going over these on the day – in order to maximise your practical shooting time.
Who is this workshop for?
This workshop is designed for photographers who are proficient with their camera: that is they already know how to expose, focus and frame up a picture, and are familiar with all of the controls and settings, and the basics of focal length, shutter speed, aperture and Iso. If you are unsure about any of these things, then this is not the workshop for you. You may want to consider a 1:1 tutorial day where we can focus on what you need to learn next, as we won’t have time on a group workshop to diagnose camera issues, or work out how to do things with your camera and this is unfair to the other attendees.
This workshop is most useful to photographers who have some experience, and want to take their lighting knowledge out on the road/trail.
So what do we mean by an “outdoor location”? I’m not talking about out in the garden of a big house. I’m talking about shooting out in the wild, whether that’s an urban or rural location, this type of shoot is defined by modes of transport and a lack of access to things like mains electricity. I.e. – how do you light and shoot an image if you need to carry all of your equipment, including camera, lenses, lights, grip and your lunch, changes of clothes, first aid kit, towels etc on your back?
In terms of equipment you’ll need to think about what you can comfortably carry. For an all-day studio shoot, I’ll bring a boat-load of equipment, a lot of which, I may not end up using, but if I’ve got room in the car, I’ll bring it so I have more options to be creative with on-set. For a foot-portable setup though, I really need to pick and choose what I take.
Now you could just take a camera and a zoom lens, just shoot whatever light you get dealt on the day. You can look around for places where the light looks good – the edge of covered areas, on cloudy days, or work with direct sunlight, however this will place a constraint on other factors. E.g. if you select an angle based on the light, it may not be the best angle for the composition or backdrop. To this end, I’ll bring a couple of lights with me so I can have my cake and eat it.
Setting your camera up
Auto-Focus setup
Working with a skilled and experienced model, it is important to establish and maintain a flow of poses. Most experienced models will shift to a new pose, or just tweak the pose after every shot. If we can keep steady pace of shooting around once per second, we’ll get more shots, and the model will be able to settle into a familiar rhythm.
Almost all cameras, out of the box, will attempt to auto-focus when you press the shutter release button. We want to focus on the leading eye. If the camera tries to auto-focus every time we take a picture, this means you will need to aim it at the model’s eye, press the shutter release part-way, recompose the shot, and then take the picture. For every shot. This will result in a very stilted, and uneasy shoot with the model having to hold their pose for much longer while you focus the lens, every time.
Most cameras have either a dedicated button to trigger the auto-focus (for Nikon this is labelled “AF-ON”), or a way of programming a button to do this. The “half press to focus” thing, is a throwback to point-and-shoot film cameras that didn’t have a dedicated focus button. For shooting in the studio with a model, I highly recommend disabling autofocus on the shutter release, so that all it does when you press that, is take a picture. On-set, you will focus once using the dedicated AF button, compose the shot, and then shoot several frames.
Mirrorless cameras with eye-detect auto-focus: this will work for almost all shots on location, however if the model is facing away from you there will be no eye to focus on, and the camera may pick up a head, or person or just do something weird depending on which camera you have. I recommend reading up on how to configure your mirrorless camera to use a traditional focus cursor as a back up just in case your Eye-AF doesn’t behave as expected.
Please read the manual for your camera, and if your camera can support this, disable AF on the shutter release before attending the workshop.
Also ensure you know how to:-
- Put the camera in manual mode
- Adjust the aperture
- Adjust the shutter speed – inc. how to access “bulb” mode for the shutter
- Adjust the Iso
- Adjust the white-balance (the white balance setting won’t change what the camera captures, but it will allow you to preview what the image will look like when you develop it later, and set the white balance)
Your camera should be set to record a raw file for each image. Developing the images yourself from the raw sensor data will give a much better result. Make sure you have set your camera up to do this before the session: i.e. either “Raw”, or “Raw+JPEG” if you also want a developed image using the values set in the camera.
Equipment you’ll need to bring
Camera: your camera will need to offer full manual control of exposure, and have a hot shoe with a standard centre pin. Note: these Canon cameras are not suitable for these workshops as their hot-shoes lack the standard centre firing pin: 200Dmkii, 1500D, 2000D, 3000D, and 4000D
Lenses: you’ll need a lens or lenses that cover around 24mm to 150mm on a 35mm (or so called “full frame”) camera, or the equivalent field of view for other camera sizes. A zoom lens is best for this type of work as it will allow you to crop in for 3/4 shots, head shots etc from the same lighting setup very quickly. Also, sometimes your model will surprise you with very expressive and wide hand or leg gestures and you’ll suddenly need an increased field of view.
Tripod: A tripod is essential for shots with moving water, such as waterfalls. We’ll need to take a “plate shot” with a slow shutter speed (around a 1/5 of a second) to get some nice flow in the water, after your model has finished posing and it’s essential the camera does not move, so we can paste the water in using layers and masks in Photoshop later.
Cards and batteries: make sure you have enough of both!
Clothing!
You’ll need to dress appropriately for the location and remember, even though you may be going for a shoot, you are still out for a trek and maybe some climbing. Wear clothing with layers that you can add and remove. You’ll be hot trekking and climbing to the location in full sun, but may then spend time standing around in a shady forest, or down at a waterfall where it is always a few degrees cooler than the open field. Wear trekking clothes – and appropriate footwear for the hike. If its really rocky full walking boots will be best, and for less challenging terrain, some approach shoes. If you’re climbing over smooth boulders on a beach, consider some crampons or spikes for your shoes. Even in urban locations, you may well find yourself rolling on the floor to get a shot, and outdoor/hiking attire is also a good choice for these locations.
For beach shoots, I wear Karrimor open sandals that I can stand in the sea with. Also bring a change of clothing that you can leave in the car and change into when you get back.
Towels: At least one towel is essential on the beach and other watery locations. This towel is for your model. If you need one, that’s two towels :). Always know where your towel is.
Things we’ll talk about
- Model safety
- Nudity in public – the law and the practical reality
- Looking for shots
- Exposing the backdrop
- Lighting and grip – including my lightweight boom solution for overhead light
- Adding flash
- Containing the flash
- Breakup gels
- Upstage lighting
- Using the sun (if it shows up)
- Fog/Smoke on location
- Water – and how to make it look good